Archy - FLL Unearthed Robot
- Description
- Curriculum
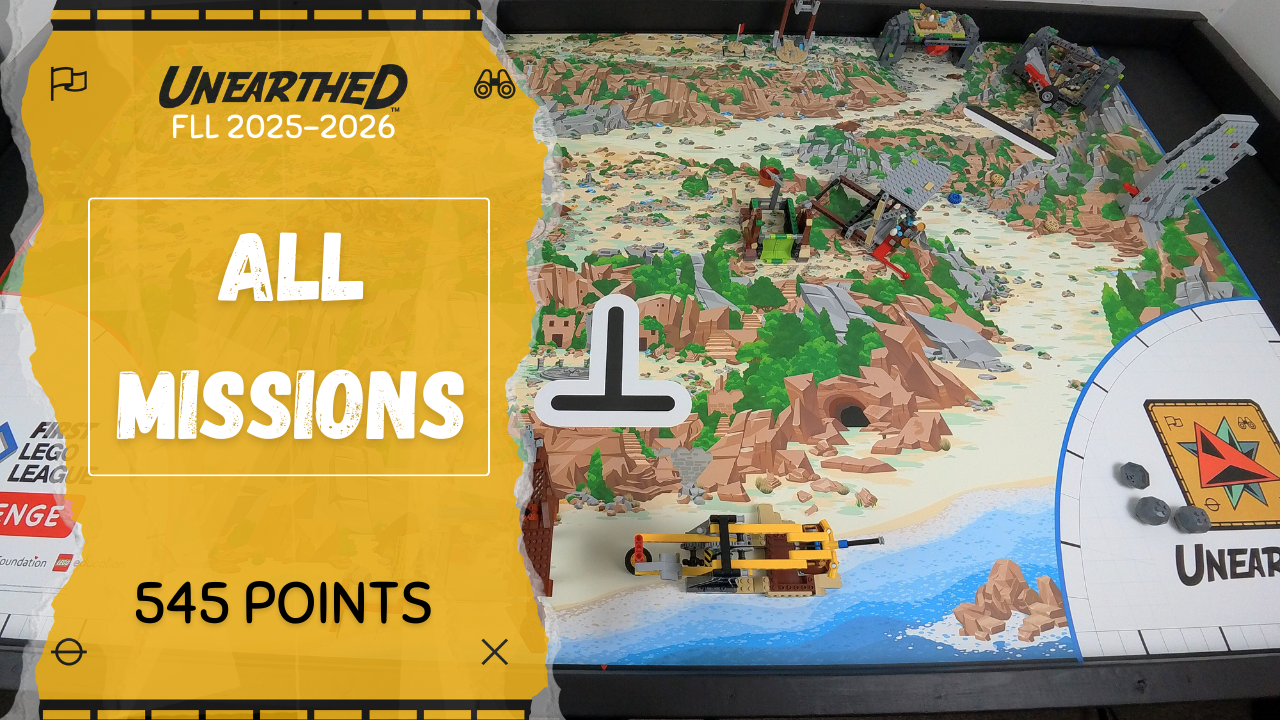
Step into the world of archaeology with the FIRST® LEGO® League Unearthed season and guide your team to success with confidence. This course is designed specifically for teachers and instructors who want to coach their students in the robot game, even if they’re new to robotics.
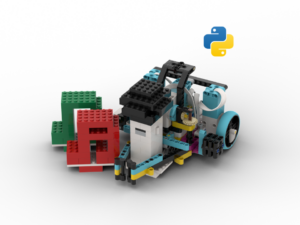
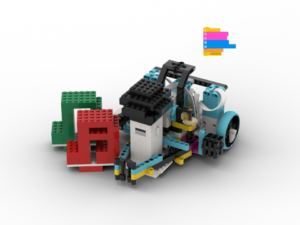
At the heart of the course is Archy, a simple yet powerful robot built with LEGO® Education SPIKE™ Prime. Archy demonstrates clear and reliable approaches to tackling every mission on the Unearthed field. Along the way, you’ll see how to design and test attachments, program mission runs, and apply strategies that make coaching easier and more effective.
This course goes beyond just winning missions — it builds real-world STEM learning opportunities for students.
What you’ll gain:
- ✅ A step-by-step walkthrough of all Unearthed missions with sample solutions
- ✅ Simple build techniques for versatile robot attachments
- ✅ Clear programming explanations for beginners and intermediate teams
- ✅ Coaching tips to help students problem-solve, adapt, and work as a team
Whether you’re leading your first FLL team or looking for new ways to inspire seasoned students, this course provides practical guidance, creative strategies, and tested examples you can bring straight to practice.
Equip your team with the skills they need, and let Archy be your guide to a fun, STEM-powered Unearthed season!
Bill of Materials:
All equipment used can be found in LEGO Spike Prime Core (45678) and Expansion (45680 or 45681) Sets. You’ll need multiple sets.
This list does not include parts that will be used in updates.


-
2
 Run 1 | M01 Surface Brushing
In this lesson, you’ll learn how to build and attach a simple tool for the first mission run. It also covers the robot’s starting position and provides a walkthrough of the program used to achieve the mission.
-
3
 Quiz: Run 1
 -
4
Run 2 | M02 Map Reveal
Just like in the lesson for the first mission, you’ll learn how to build and attach a sample tool for the first mission run. However, this tool has a 'passive mechanism' that can be triggered to act on the mission model.
We’ll walk through how to position the robot before launch and then demonstrate the program in action to complete the mission.
-
5
Quiz: Run 2
-
6
Run 3 | M03 Mineshaft Explorer and M04 Careful Recovery
This lesson highlights how a single attachment can be made for multiple missions and how the attachment is placed on the robot.
The initial position of the robot before it is launched is shown as well as a run through of the program to achieve the missions.
-
7
Quiz: Run 3
-
8
Run 4 | M12 Salvage Operation and M15 Site Marking
Again, we see how a single attachment can be used for multiple missions and how to build and trigger a passive mechanism.
We’ll walk through how to position the robot before launch and then demonstrate the program in action to complete the mission.
-
9
Quiz:Run 4
-
10
Run 5 | M14 Forum and M15 Site Marking
We move a flag and the collected artifacts to score points for Missions 14 and 15.
We’ll walk through how to position the robot before launch and then demonstrate the program in action to complete the missions.
-
11
Quiz:Order of Missions
-
12
Run 6 | M13 Statue Rebuild
This lesson shows a simple mechanism for the Statue Rebuild mission.
It also covers the robot’s starting position and provides a walkthrough of the program used to achieve the missions.
-
13
Run 7 | M11 Angler Artifacts and M10 Tip the Scales
This lesson demonstrates how to move from one launch area to the other while executing multiple missions.
It also covers the robot’s starting position and provides a walkthrough of the program used to achieve the missions.
-
14
Run 8 | M09 What’s on Sale
In this lesson, we consider a simple passive mechanism for the What's on Sale mission.
We also cover the robot’s starting position and provide a walkthrough of the program used to achieve the mission.
-
15
Quiz: Combining Missions
-
16
Run 9 | M06 Forge, M05 Who Lived Here? and M07 Heavy Lifting
This lesson highlights how a single attachment can be made for multiple missions and how the attachment is placed on the robot.
The initial position of the robot before it is launched is shown as well as a run through of the program to achieve the missions.
-
17
Run10 | M08 Silo
This lesson shows a sample mechanism for the Statue Rebuild mission.
It also covers the robot’s starting position and provides a walkthrough of the program used to achieve the missions.
-
18
Run 11 | M15 Site Marking and M14 Forum (From Second Launch Area)
This lesson highlights how a single attachment can be made for multiple missions and how the robot finishes the challenge.
The initial position of the robot before it is launched is shown as well as a run through of the program to achieve the missions.
-
19
 Combined Program
We’ll walk through how to combine all the programs from the previous section into a single program in which the individual programs can be easily selected.
-
20
Run 1 Update
Run 1 was updated to combine Missions 01, 02, 03 and 04
-
21
Run 4 Update
Run 4 has been updated to also include M11 - Angler Artifacts
-
22
Run 5 Update
Run 5 was updated to also achieve Mission 13
-
23
Run 9 Update
Run 9 was updated to also achieve Mission 8.
This brings the total number of runs for completing all missions to 5.